In this post I’ll show you how to build Audio Unit Plugins programmed in SuperCollider using the AudioUnitBuilder. First of all, I want to refer to this excellent Tutorial, in which Abel Domingues explains in great detail how the whole Audio Unit architecture works and how the SuperCollider AU works. I would advise you to read this first, especially if you want detailed background knowledge. However, some things were not working for me out of the box and therefore I decided to share some problem solutions here.
My instructions were created with the following Setup:
- Mac OS X Mountain Lion (10.8.4)
- SuperCollider 3.5.1
- Xcode 4.6.3 (4H1503)
Install Dependencies
First of all, the following software prerequisites need to be installed:
- Download and install SuperCollider 3.5.1 to a location of your choice.
- Download Xcode 4. This requires an Apple Developer Account. Unfortunately, the file is very large (1.7 GB). Install it and open it (make sure you don’t confuse it with your old Xcode, if you had one before)
- In Xcode, click on the Main Application Menu and go to Open Developer Tool -> More Developer Tools. Alternatively, you can go directly to this page. Download the Command Line Tools for Xcode and install them.
- Download the SuperCollider AU from here. It has to be extracted to ~/Library/Audio/Plug-Ins/Components.
- Open your SuperCollider and execute Quarks.gui. Install the AudioUnitBuilder Quark (you need to have an internet connection and SVN installed for that).
Adjust Paths in the AudioUnitBuilder Code
The current AudioUnitBuilder refers to some old paths, which have changed. In particular, the Rez executable is now in another location, as well as the Server Plugins. Both are now packaged into an .app Container. Open the AudioUnitBuilder Source Code (mark the classname and press Cmd+Y). Inside the file you see the classvar
1 | classvar <>rez="/Developer/Tools/Rez" |
which has to be changed to
1 | classvar <>rez="/Applications/Xcode.app/Contents/Developer/Tools/Rez" |
Next, look for the method copyPlugins (in the lower third of the class). The line
1 2 | cmd = "grep -e _"++ugens.asSequenceableCollection.join("_ -e _") + "_ plugins/*.scx"; |
must be changed to
1 2 | cmd = "grep -e _"++ugens.asSequenceableCollection.join("_ -e _") + "_ SuperCollider.app/Contents/Resources/plugins/*.scx"; |
Don’t forget to recompile your library (Cmd+K) before you proceed.
Open An Example AU Specification
The AudioUnitBuilder comes with an example file called fedDelay.rtf. You find it in the Quark Installation Directory, which is ~/Application Support/SuperCollider/quarks/AudioUnitBuilder/examples. Open the file in SuperCollider.
To use the AudioUnitBuilder, you’ll need to specify the following:
- Name of your Audio Unit
- Component Type (\aumu, \aumx, \augn or \aufx, which stands for Instruments, Mixers, Generators or Effects, respectively)
- Component Subtype (A four letter code identifying your plugin)
- specs: A two-dimensional array specifying the parameters for your plugin
- func: the function implementing the actual signal processing
Building the Audio Unit
At the end of the example file, you see the simple instructions needed to build your AU using the AudioUnitBuilder:
1 2 | builder = AudioUnitBuilder.new(name, componentSubtype,func, specs, componentType); builder.makeInstall; |
Basically the things we have specified are passed in the constructor, and then the method makeInstall does the magic. Hm, but what does it do actually? It is a good idea to look into the source code to understand it. I will try to summarize it here shortly:
- The contents of SuperColliderAU.component are copied recursively to <yourPluginName>.component
- All plugins (Ugens) are deleted
- XML Property list files are created to configure the server running inside the AU and your plugin
- A Resource file is created based on a template (which is SuperColliderAU.rsrc in the quark directory). Some placeholders in that template are replaced using the sed Unix command. The resource is processed with the Rez tool delivered with Xcode.
- The DSP function you specified is compiled as SynthDef.
- The compiled SynthDef is copied to the synthdefs folder inside the AU.
- Plugins (UGens compiled as .scx files) needed for signal processing are copied from your SuperCollider installation to the AU.
To let the AudioUnitBuilder do all those things for you, you simply need to select the whole file and execute it. If you are lucky, you will get an output like
Created ~/Library/Audio/Plug-Ins/Components/fedDelay.component
an AudioUnitBuilder
But if something goes wrong, here are some of my solutions and debugging tips:
- I got “Error running Rez” on the console which I traced down to an inclusion problem in the resource file. If you open SuperColliderAU.rsrc file in a text editor, you’ll see the inclusion #include <CoreServices/CoreServices.r> which could not be resolved. The solution is to install the Xcode Command Line Tools, as described above.
- You can debug the commands executed in the Builder by changing .systemCmd calls to .postln.systemCmd.
- You can inspect the files created during the building process by changing mv commands to cp commands. This way all files can be reviewed in the quarks/AudioUnitBuilder directory.
- Check the contents of the .component target file by browsing it in the Finder (right click -> Show Package Contents).
- My working Audio Unit has a size of about 2 MB. If it is significantly smaller, that you might forgot to put the SuperColliderAU.component as skeleton AU into your Plug-Ins/Components folder.
The working AU should contain
- Contents/MacOS/SuperColliderAU
- Resources/plugins/(some .scx files)
- Resources/pluginSpec.plist
- Resources/serverConfig.plist
- Resources/SuperColliderAU.rsrc
- Resources/synthdefs/fedDelay.scsyndef
Alright? Then let’s validate our AudioUnit.
Audio Unit Validation
Apple developed a tool called auval to validate Audio Units. This is very useful for debugging, as you see error message from the SuperCollider server during the validation process.
Open a terminal window and execute
1 | auval -v aufx FEDL SCAU |
This will start the validation process for the plugin identified by a triple. The three parameters are component type, component subtype and manufacturer. Read the output if you find any error messages like “SynthDef not found”. If this is the case, then you most likely used the wrong SuperCollider version. To be compatible with the server shipped in the AU, the AudioUnitBuilder must be executed with SuperColldier 3.5.1.
Try Out Your Audio Unit
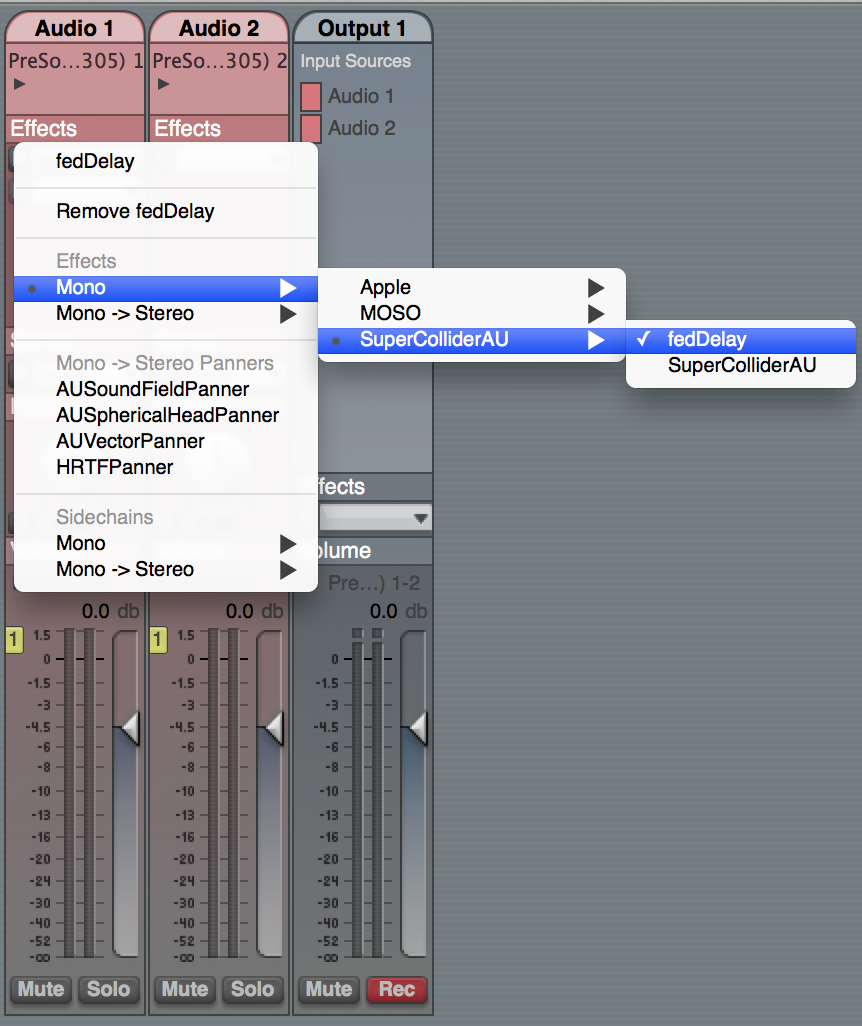
If validation passed successfully, you can use your AU in any AU-compatible audio environment. For example you can download the Audio Tools for Xcode from the Apple Developer page. It contains an App called AU Lab, which you can use to test your plugin. Here is how you insert the AU as effect:
 And this is the generated UI to control the plugin:
 So this is it. I hope you got your AU running and have lots of fun coding you own AUs with SuperCollider 🙂