Replacing org.eclipse.equinox.ds with org.apache.felix.scr in Eclipse Product Builds

In recent Eclipse versions, the declarative service implementation Equinox DS was replaced with Apache Felix service runtime components. As a result, my product build with an Eclipse 2018-12 target platform using Tycho failed with the following error:

Unable to satisfy dependency from toolinggtk.linux.x86org.eclipse.equinox.ds 4.2.0.201810261013 to osgi.bundle; org.eclipse.equinox.ds 1.5.200.v20180827-1235

To solve this problem, I had to update my .product file. Open it with the product editor and switch to the Configuration tab. In the middle, bundle start levels can be configured. Most likely your product file still contains an entry for org.eclipse.equinox.ds here. This has to be removed and replaced with an entry for org.apache.felix.scr with start level 2. This can easily be achieved by clicking the Add Recommended button on the right hand side. My resulting configuration looks like this:

Product Start Level Configuration

If everything is set up correctly, you can build your product again. Happy coding!

Adding Custom Splash Screens for Eclipse Products

Today I tried adding and configuring a custom splash screen to a custom Eclipse application, and found a number of pitfalls, which is why I decided to write a blog post summarizing the required actions.

Adding the Splash Bitmap

The splash image must be saved as a bitmap file named splash.bmp with 24 bits per pixel and should have dimensions of approximately 500×330 pixels. Save this file in the root of your product-defining plugin (which is usually named tld.domain.product.rcp). Specify this plugin in the Splash section of your .product file.

Enable Progress Reporting

To enable progress reporting on your splash screen, an .ini file for customizations must be defined. This is normally done in your RCP plugin, which contains a plugin.xml file declaring the extension org.eclipse.core.runtime.products. Under this extension, your product is defined. The product node typically contains child nodes with properties of your product, such as the name of your application (property appName). Here another property has to be added with the name preferenceCustomization and the value plugin_customization.ini. Create this file in the root of your RCP plugin if it does not exist already. To enable progress reporting for your splash screen, add the following line:

org.eclipse.ui/SHOW_PROGRESS_ON_STARTUP=true

Adjust Positions of Progress Bar and Progress Message

Now comes a pitfall: In older Eclipse versions, the positions of the progress bar and progress message could be adjusted in the product file. The following UI is provided for that:

However, in newer Eclipse versions the values of this UI are not used anymore! In order to configure the positions, properties have to be added in the previously mentioned plugin.xml file of your RCP plugin as children of your product node.

The positions are added in the form of comma-separated lists in the following format:

x, y, width, height

As an example, consider the following entries:

1
2
<property name="startupProgressRect" value="0,290,498,10"/>
<property name="startupMessageRect" value="5,310,493,15"/>

The coordinates are relative to the top left corner of the splash screen image. Additionally, the color of the progress message text can be changed with the property startupForegroundColor. The value is a hexadecimal color code with two hex digits for red, blue and green, respectively. For example, black font color can be specified with the following code:

1
<property name="startupForegroundColor" value="000000"/>

Relevant documentation can be found here:

Eclipse Enablement Expressions for Files with Specific Extension

While developing a UI plugin for Eclipse, I wanted to activate a specific context menu entry only for files with a specific extension. Because it took some time to figure the solution out, I decided to share it for others who want to implement this.

This example demonstrates the enablement for a launch shortcut, but of course this can be adapted to other extensions with enablement support, too.

One or More Files with Specific Extension

1
2
3
4
5
6
7
8
9
10
11
12
13
14
15
16
17
18
19
20
21
22
<extension point="org.eclipse.debug.ui.launchShortcuts">
  <shortcut class="tld.domain.plugin.ui.MyLaunchShortcut"
            icon="icons/icon.png"
            id="tld.domain.plugin.ui.launchShortcut"
            label="My Launch Shortcut"
            modes="run">
    <contextualLaunch>
      <enablement>
        <with variable="selection">
          <count value="+"/>
          <iterate operator="and">
            <adapt type="org.eclipse.core.resources.IFile">
              <test property="org.eclipse.core.resources.extension"
                    value="ext">
              </test>
            </adapt>
          </iterate>
        </with>
      </enablement>
    </contextualLaunch>
  </shortcut>
</extension>

The enablement is based on the selection, which should contain at least one element (count=+). Then the resources are iterated and adapted to IFile if applicable. Then the file extension is checked (in my example the extension ext, i.e. all files with the file name pattern *.ext are permitted). Note that the test properties must be given with a namespace (e.g. extension is wrong, whereas org.eclipse.core.resources.extension is correct).

One or More Files with Multiple Valid File Extensions

Another use case is to allow multiple file extensions. In this case, an additional <or> element is required as child of the <adapt> instruction as shown below:

1
2
3
4
5
6
7
8
9
10
11
12
13
<enablement>
  <with variable="selection">
    <count value="+"/>
    <iterate operator="and">
      <adapt type="org.eclipse.core.resources.IFile">
        <or>
          <test property="org.eclipse.core.resources.extension" value="xml"/>
          <test property="org.eclipse.core.resources.extension" value="xsd"/>
        </or>
      </adapt>
    </iterate>
  </with>
</enablement>

Added June 18, 2019:

Multiple Files with Multiple Valid Extensions

The following enablement tree will show the element if more than one file .xml or .xsd file is selected simultaneously. Note the corresponding count expression (1-, which means 1 to unbounded, where 1 is excluded.

1
2
3
4
5
6
7
8
9
10
11
12
13
14
15
16
17
18
19
20
<enablement>
  <with variable="selection">
    <count value="(1-">
    </count>
    <iterate operator="and">
      <adapt type="org.eclipse.core.resources.IResource">
        <or>
          <test
                property="org.eclipse.core.resources.extension"
                value="xml">
          </test>
          <test 
                property="org.eclipse.core.resources.extension"
                value="xsd">
          </test>
        </or>
      </adapt>
    </iterate>
  </with>
</enablement>

Single File with Specific Extension or Container (Project / Folder)

This will enable the UI element if a file with a specific extension, a project or a folder is selected:

1
2
3
4
5
6
7
8
9
10
11
12
13
14
15
16
17
18
19
<enablement>
  <with variable="selection">
    <count value="1">
    </count>
    <iterate ifEmpty="false" operator="or">
      <or>
        <adapt type="org.eclipse.core.resources.IFile">
          <test
                property="org.eclipse.core.resources.extension"
                value="mcl">
          </test>
        </adapt>
        <instanceof
                    value="org.eclipse.core.resources.IContainer">
        </instanceof>
      </or>
    </iterate>
  </with>
</enablement>

Also see the Eclipse Documentation for a full list of available properties and the Platform Expression Framework documentation.

Renaming git-managed Eclipse Projects

During longer development projects it sometimes becomes necessary to change the overall bundle structure, involving renaming packages and project/bundle names. For git-managed projects this requires one additional step in order to keep bundle names and their physical git location in sync. This blog post summarizes the steps for the most common refactoring actions.

Renaming Package Trees

Eclipse provides excellent support for renaming packages recursively. Right-click the root package of a bundle and then choose Refactor -> Rename. This brings up a dialog in which you can enter the new package name. This dialog also provides the option Rename Subpackages which will rename the whole package tree recursively. Note that all references to the classes in the renamed packages will also be updated.

Renaming Projects/Bundles

Renaming a project basically requires the same steps as renaming packages. Right-click a project, choose Refactor -> Rename and enter the new project name.

Now comes the interesting part: When renaming a git-based project the change will not be reflected in the filesystem of the git repository. Instead, only the <name> tag in the .project file is adjusted. You can verify this in the project properties in the Resource section (compare Path and Location).

To change to pyhsical git location, you have to specify the new location using the Refactor -> Move dialog. Here you can adjust the actual folder name in the git repository.

moveGitLocationAfter that, you can commit all changes in git. The history of the moved project will be preserved. I hope this will help you re-structuring your projects.

Getting Rid of Rattling Sounds in a Dual 1210 Record Player

Vintage record players like the ones produced by the German company Dual are still popular today because of their excellent workmanship and sound. I have the privilege of owning one and using it regularly. Unfortunately it began making an annoying rattling sound lately. This is how I repaired it: The first challenge is opening the record player. I found this video explaining how this is done for Dual record players. The following picture shows the inside of the device. The mechanical constructions for the automatic movement of the arm are absolutely amazing!

DualPlattenspielerMitPfeilThe rattling sound was caused by the motor, which is located in the lower center of the picture. In order to get rid of the noise, you have to disassemble the parts surrounding the motor and oil them well. Afterwards the record player should work smoothly again. If this does not help, it might be necessary to disassemble the motor itself as explained here.

Creating Full Backups of your Android Smartphone Without Root Access

In this blog post I will explain how you can create a full backup of your Android smartphone, even if you don’t have root access.

“Become” a Developer

The first step is to activate the developer options in your system settings menu. To do that, locate the build number in your device info menu. This is usually located somewhere under Settings -> Device Info. Once you located it, you have to tap the build number seven times in order to unlock the developer features of your phone.

Enable USB Debugging

Once you unlocked the developer mode, there is a new menu in your settings called Developer Options. Find this menu and enable USB Debugging.

Install the Android Debug Bridge

The next step is to install a tool called adb (Android Debug Bridge). It is part of the Android SDK (Software Developer Kit). The problem is that the current version as of the time of writing (1.0.32) is unusable due to a bug (see bug report). As soon as this bug is fixed, you can dowload the SDK Command Line Tools from the official download page or install a current version using Homebrew.

Update March 9th, 2017: Tested again with version 1.0.36 (Revision 0e9850346394-android), and the backup works. However, an app blocked the backup process. After uninstalling the app, the full backup was successful.

Connect Your Device

After you installed a working version of adb, you can check the connection between your device and your computer. To do this, you need to locate the adb executable file in your SDK installation or your extracted folder. Open a terminal and type the following command:

/path/to/adb devices

where /path/to/adb must be replaced with the absolute path to the adb executable. Mac users can drag and drop the adb file from the Finder into the terminal in order to insert the complete path automatically. This should result in an output similar to:

List of devices attached 
3204226a921e227d    device

Make the Backup

If your device is connected, you can perform the backup with the following command:

/path/to/adb backup -all -apk -shared

This starts a backup process including all apps (-all), APK archives (-apk) as well as the internal and external storage data (internal memory and SD cards, -shared). If you don’t need all of this data, you can skip the correspondent parameter.

After issuing the command, you will be asked to confirm the backup operation on your smartphone. You can enter a password to encrypt your backup, which I recommend. Note that the backup process can take a long time depending on how much data is persisted on your phone. The process should result in a large file called backup.ab which is stored in the current folder (if you did not navigate to another directory: in your user home folder). If you want the backup to be stored elsewhere, you can supply the parameters -f <path> specifiying the target file path.

If the file is empty or contains only 41 bytes (when using no password) or 549 bytes (when using password) then you have a buggy version installed and need to get an older version (see previous sections).

Restoring Backups

Backups can be restored using the command

adb restore /path/to/backup.ab

Installing Python 3 and music21 using Homebrew and pip3

In this blog post I’m going to explain how the Python library music21 can be installed in conjuction with Python 3 and its dependencies matplotlib, numpy and scipy on Mac OS X. It can also be used as a tutorial for installing any other Python libraries/modules as well.

The Problem

Initially, on my system there were two parallel Python 2 and Pyton 3 installations. The music21 installer chose Python 2 as default installation target. In order to use music21 in conjuction with Python 3, I tried to install it using the command

1
pip3 install music21

which worked fine. However, when I tried to use the plotting capabilities of music21 an error occured due to the missing modules matplotlib, numpy and scipy. When trying to install matplotlib issuing

1
pip3 install matplotlib

the following error occurred:

SystemError: Cannot compile 'Python.h'. Perhaps you need to install python-dev|python-devel.

Installing Python 3 using Homebrew

My final solution to this problem was to set up a new Python 3 installation using  Homebrew. This is done by installing Homebrew (if you haven’t got it yet):

1
ruby -e "$(curl -fsSL https://raw.githubusercontent.com/Homebrew/install/master/install)"

Python 3 is installed using the command

1
brew install python

Note: Previously, the formula name was python3 but was renamed to python as Python 3 is now the official default version. The old version can be installed using brew install python@2.

If you already have Python 3 installed, Homebrew will not be able to create symlinks to the python binaries since they already exist. To overwrite the existing symlinks (and thus to set the Homebrew Python as default interpreter for your system) you have to execute this command:

1
brew link --overwrite python

Now, symlinks to the new python installation are created under /usr/local/bin.

By the way: python updates can now be installed by simply executing

1
brew upgrade python

Adjusting the $PATH Variable

In some cases it might be required to tweak the settings of the $PATH environment variable, namely if the old Python 3 installation is still preferred by the system because of a $PATH entry with higher priority. To check if this step is necessary, type:

1
which python3

If the output is /usr/local/bin/python3, you can proceed to the next section. Otherwise, check the contents of your $PATH variable with this command:

1
echo $PATH

which might look like this:

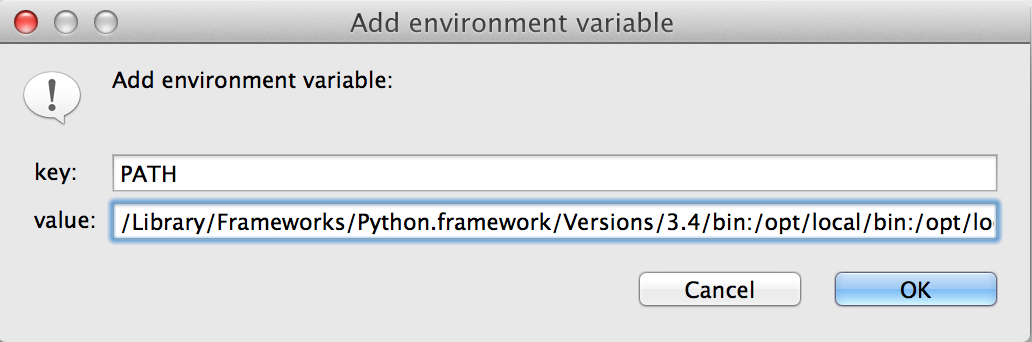
/Library/Frameworks/Python.framework/Versions/3.4/bin:/opt/local/bin:/opt/local/sbin:/opt/local/bin:/opt/local/sbin:/opt/subversion/bin:/sw/bin:/sw/sbin:/opt/local/bin:/opt/local/sbin:/usr/local/bin:

As you may notice, the old interpreter entry /Library/Frameworks/Python.framework/Versions/3.4/bin precedes /usr/local/bin. To give priority to the new Python 3 interpreter, change the order of the paths, ensuring that /usr/local/bin precedes other python paths:

1
export PATH=/usr/local/bin:[more path elements here]

This command changes the $PATH settings for the current shell session only. If you want to make the path adjustments persistent, add the command to the file .bash_profile in your user home folder. It is also possible to reuse the current value of the variable:

1
export PATH="/usr/local/bin:$PATH"

After that, our Python 3 installed with Homebrew should now be the default system interpreter. Verify this with

1
which pip3

which should echo /usr/local/bin/pip3, which is in turn a symlink to the Homebrew cellar (the place where Homebrew installs modules/packages).

Installing the Dependencies

Now you should be able to install music21 and the dependencies using pip3:

1
2
3
pip3 install music21
pip3 install matplotlib # this will install numpy automatically
pip3 install scipy

I hope this will help you to install a clean music21 environment. No go have fun with musical analysis and plotting 🙂

Library Bundles for your Xtext DSL

Xtext offers powerful cross-reference mechanisms to resolve elements inside the current resource or even from imported resources. External resources can either be imported explicitly or implicitly. My goal was to provide a library for my DSL containing a number of elements which should be referencable from “everywhere”. Consequently the “header” files from my library must be imported implicitly on a global level.

Creating a Library Bundle

To create a bundle for your library, use the New Project Wizard in Eclipse and choose Plug-In Development -> Plug-In Project. In this way as OSGi-based bundle will be created. Create a new folder for your resources to be imported globally (e.g. headers) and copy your header files (written in your DSL) to this folder.

Registering Implicit Imports in your DSL Bundle

Global implicit import behaviour is achievable using a custom ImportUriGlobalScopeProvider. Create your class in your DSL bundle in the package <your DSL package prefix>.dsl.scoping and extend org.eclipse.xtext.scoping.impl.ImportUriGlobalScopeProvider:

1
2
3
4
5
6
7
8
9
10
11
12
13
14
15
16
17
18
import java.util.LinkedHashSet;
import org.eclipse.emf.common.util.URI;
import org.eclipse.emf.ecore.resource.Resource;
import org.eclipse.xtext.scoping.impl.ImportUriGlobalScopeProvider;
 
public class MyDSLImportURIGlobalScopeProvider extends ImportUriGlobalScopeProvider
{
    public static final URI HEADER_URI = URI.createURI("platform:/plugin/my.dsl.library/headers/myHeader.ext");
    
    @Override
    protected LinkedHashSet<URI> getImportedUris(Resource resource)
    {
        LinkedHashSet<URI> importedURIs = super.getImportedUris(resource);
        importedURIs.add(HEADER_URI);
        return importedURIs;
    }
 
}

The method getImportedUris() is overwritten and extends the set of imports retrieved from the super implementation. Note that I used a platform:/plugin URI here, which is actually resolved sucessfully in an Eclipse Runtime Workspace. In the itemis blog article about global implicit imports classpath-based URIs are used. A disadvantage of classpath-based library resolving is that it does not work out-of-the-box. In fact you have to create a plug-in project in the runtime workspace and add a dependency to your library bundle in MANIFEST.MF manually. I successfully avoided this problem by using platform:/plugin URIs which are resolved as soon as the library bundle is present in the run configuration of the runtime Eclipse instance.

Now your global scope provider has to be bound in the runtime module of your workspace. Open MyDSLRuntimeModule and add the following binding:

1
2
3
4
5
@Override
public Class<? extends IGlobalScopeProvider> bindIGlobalScopeProvider()
{
    return MyDSLImportURIGlobalScopeProvider.class;
}

If you start your runtime eclipse with the library bundle now, your global implicit imports should be resolved in the editor for your DSL.

 Resolving Implicit Global Imports in Standalone Mode

If you rely on the global implicit imports in standalone mode (e.g. in unit tests executed in your development Eclipse instance) the platform:/plugin URIs can not be resolved. But this can easily be fixed by using URI mappings in a ResourceSet. The following example shows how to create a standalone parser by injecting a ResourceSet and creating an URI mapping:

1
2
3
4
5
6
7
8
9
10
11
12
13
14
15
16
17
18
19
20
21
22
23
24
25
26
27
28
29
30
31
32
33
34
35
36
37
38
39
40
41
42
43
44
45
46
47
48
49
50
51
52
53
54
55
56
57
58
59
60
61
62
public class StandaloneXtextParser
{    
    @Inject
    private XtextResourceSet resourceSet;
 
    private boolean initialized;
    
    public StandaloneXtextParser()
    {
        super();
    }
 
    public EObject parse(URI uri) throws IOException
    {
        initializeIfApplicable();
        Resource resource = resourceSet.getResource(uri, true);
        return resource.getContents().get(0);
    }
 
    private void initializeIfApplicable()
    {
        // Note: this is not the most elegant way, just for demonstration purposes
        // Just make sure that setupParser() is called once before you parse
	if(!initialized)
        {
            setupParser();
	    initialized = true;
        }
    }
 
    protected void setupParser()
    {
        resourceSet.addLoadOption(XtextResource.OPTION_RESOLVE_ALL, Boolean.TRUE);
        registerURIMappingsForImplicitImports(resourceSet);
    }
    
    private static void registerURIMappingsForImplicitImports(XtextResourceSet resourceSet)
    {
        final URIConverter uriConverter = resourceSet.getURIConverter();
        final Map<URI, URI> uriMap = uriConverter.getURIMap();
        registerPlatformToFileURIMapping(MyDSLImportURIGlobalScopeProvider.HEADER_URI, uriMap);
    }
 
    private static void registerPlatformToFileURIMapping(URI uri, Map<URI, URI> uriMap)
    {
        final URI fileURI = createFileURIForHeaderFile(uri);
        final File file = new File(fileURI.toFileString());
        Preconditions.checkArgument(file.exists());
        uriMap.put(uri, fileURI);
        
    }
 
    private static URI createFileURIForHeaderFile(URI uri)
    {
        return URI.createFileURI(deriveFilePathFromURI(uri));
    }
 
    private static String deriveFilePathFromURI(URI uri)
    {
        return ".." + uri.path().substring(7);
    }
}

The trick is to add an URI mapping which resolves the platform:/plugin URI to a relative file URI. Then the library resources are resolved by means of a relative path in the workspace and the global implicit imports can also be used in unit tests. For more information on standalone parsing please read this blog article.

Other useful resources:


Displaying Tracks of your Music Library Filtered by Bit Rate

If you prefer managing your music in the form of audio files on your computer, your collection has probably grown over the past few years and at the same time encoding standards have improved and expectations of sound quality have risen. In most cases, the contained audio files have different sound qualities regarding their bit rates. My motivation was to display a list of files in my music collection which have a bit rate equal to or higher than 256 kbit/s.

To achieve this, I looked for command line tools that display metadata for audio files including their bit rate. For Mac OS X I found the command afinfo which works out of the box:

afinfo myFile.mp3 | grep "bit rate"

The output looks similar to this:

bit rate: 320000 bits per second

If you are using another operating system, you can check for the following commands and/or install them:

1
2
3
4
5
file <fileName> (Ubuntu)
mp3info -r a -p "%f %r\n" <fileName>
mediainfo <fileName> | grep "Bit rate"
exiftool -AudioBitrate <fileName>
mpg123 -t <fileName>

My goal was to develop a program that crawls through my whole audio collection, checks the bit rate for every file and outputs a list containing only files with high bit rate. I wrote a Python script which does exactly that:

1
2
3
4
5
6
7
8
9
10
11
12
13
14
15
16
17
18
19
20
21
22
23
24
25
26
27
28
29
30
31
32
33
34
35
36
37
38
39
40
41
42
43
44
45
46
47
48
49
50
51
52
53
54
55
56
57
'''
Created on 25.04.2015
 
@author: dave
'''
 
import sys
import os
import subprocess
import re
 
# console command to display properties about your media files
# afinfo works on Mac OS X, change for other operating systems
infoConsoleCommand = 'afinfo'
 
# regular expression to extract the bit rate from the output of the program 
pattern = re.compile('(.*)bit rate: ([0-9]+) bits per second(.*)', re.DOTALL)
 
def filterFile(path):
    '''
    Executes the configured info program to output properties of a media file.
    Grabs the output, filters the bit rate via a regular expression and displays the
    bit rate and the file path in case the bit rate is >= 256k
    Returns True in case the file has a high bit rate, False otherwise
    '''
    process = subprocess.Popen([infoConsoleCommand, path], stdout=subprocess.PIPE, stderr=subprocess.PIPE)
    out, err = process.communicate()
    match = pattern.match(str(out))
    if match != None:
        bitRateString = match.group(2)
        bitRate = int(bitRateString)
        if bitRate >= 256000:
            print("bit rate",bitRate,":",path)
            return True
    return False
 
def scanFolder(rootFolder):
    '''
    Recursively crawls through the files of the given root folder
    '''
    numFiles = 0
    numFilesFiltered = 0
    for root, subFolders, files in os.walk(rootFolder):
        for file in files:
            numFiles = numFiles + 1
            path = os.path.join(root,file)
            if filterFile(path):
                numFilesFiltered = numFilesFiltered + 1
    print("Scanned {} files from which {} were filtered.".format(numFiles, numFilesFiltered))
 
# main program
if len(sys.argv) != 2:
    print("Usage: MP3ByBitrateFilter ")
    sys.exit(1)
 
rootFolder = sys.argv[1]
scanFolder(rootFolder)

The root folder of your music library can be given as command line argument. The programs walks through the folder recursively and executes the command line program to display the bit rate in a separate process. It grabs the output and filters the bit rate from the output using a regular expression. The bit rate and the path of the file are displayed in case the bit rate is >= 256 kbit/s. A summary is also displayed showing the total number of files and number of filtered files.

Of course you can extend the filter criteria by adjusting the script to extract other information than the bit rate from the info command.

Including DOT Graphs as PostScript or PDF files in LaTeX documents

Graphviz is a great open source graph visualization software. In this post I’ll demonstrate how to include DOT graphs in PDF documents using LaTeX.

The most convenient way to insert graphics into PDF documents is to use vector graphics. In contrast to raster graphics (which are pixel-based) vector graphics can be scaled arbitrarily without getting “pixelated”.

From DOT the graphics can be exported in vector graphics as Portable Document Format (PDF) or Encapsulated Post Script (EPS) files. The file type you need depends on the LaTeX compiler you are using. The standard latex compiler can handle EPS files, whereas pdflatex supports PDF graphics.

Option 1: Using latex and EPS graphics

Assuming you have persisted your graph in a dot file, say myGraph.dot, you can convert it to an Encapsulated Post Script (EPS) file by using the dot tool from the command line:

1
dot -Tps2 myGraph.dot -o myGraph.eps

Here is a nice shell script which converts all dot files in the current directory to eps files:

1
2
3
4
5
6
7
8
#!/bin/bash
for f in *.dot; do
  basename=$(basename "$f")
  filename=${basename%.*}
  command="dot -Tps2 $f -o ${filename}.eps";
  echo $command;
  $command;
done

To use it, simply save it as an .sh file, execute chmod 755 on it and execute it in the terminal (works for unix-based systems only).

Having done that, we try to insert that image in our pdf file:

1
2
3
4
5
6
7
\begin{figure}[htp]
\begin{center}
  \includegraphics[width=0.9\textwidth]{myGraph}
  \caption{My Caption}
  \label{fig:myGraph}
\end{center}
\end{figure}

Note that the file extension is ommited.

Unfortunately, the pdflatex compiler does not support EPS images. But don’t worry, there are two options for solving that.

Option 2: Using pdflatex and PDF graphics

If you are using pdflatex, PDF graphics have to be produced instead of EPS graphics. This is done as described in the previous section, except another target file type is specified:

1
dot -Tpdf myGraph.dot -o myGraph.pdf

Option 3: Using pdflatex and converting EPS to PDF on the fly

The epstopdf LaTeX package converts your EPS files to PDF files on the fly, which then can be included in your document. This is how you must configure your graphic packages in the preamble of your LaTeX document (code from this blog post):

1
2
3
4
5
6
7
8
9
10
11
12
13
14
15
\newif\ifpdf
\ifx\pdfoutput\undefined
   \pdffalse
\else
   \pdfoutput=1
   \pdftrue
\fi
\ifpdf
   \usepackage{graphicx}
   \usepackage{epstopdf}
   \DeclareGraphicsRule{.eps}{pdf}{.pdf}{`epstopdf #1}
   \pdfcompresslevel=9
\else
   \usepackage{graphicx}
\fi

The epstopdf package will automatically create a PDF file of your figure and include it in your document. However, the following requirements must be fulfilled:

The -shell-escape option must be set when invoking the compiler. The command line setting for this invocation can be set in your LaTeX IDE. Here I will illustrate how to configure this setting using the TeXlipse IDE for Eclipse:

Builder SettingsOpen Preferences -> Texlipse -> Builder Settings, select the PdfLatex program and click Edit. The following dialog appears, in which you can add the -shell-escape option to the command line:

-shell-escape optionAnother requirement (which is specific to the TeXlipse environment) is the PATH variable, which has to be set. Otherwise, the shell commands called from LaTeX can not be executed correctly. Check out your system path by opening a terminal and typing:

1
echo $PATH

Copy the output to the clipboard, and in TeXlipse go to Preferences -> TeXlipse -> Builder Settings -> Environment. Click Add and create a new environment variable named PATH with the value of your system path, which you just copied from the terminal:

AddEnvironmentVariableAfter that, the EPS-to-PDF conversion should work on the fly. If it does not work for some reason, you can manually invoke the conversion from the command line:

1
epstopdf myGraph.eps

You can now publish PDF documents with infinitely-scalable graphs 🙂